Posts

Showing posts from 2020

Sea Creatures - A Study of Texture, Color and Nature

Image
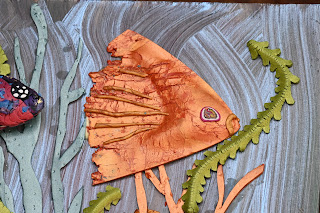
Series of Four - Texture, Color and Nature  It's always fun to start a new project.  This time I wanted to explore nature with techniques using texture and color highlighting sea creatures.  The sea fascinates me with all the large and small shapes of animals, with animals that look like flowers and plants, with seashells that were homes and so much more.   Selecting which creatures I use in this study took some research, planning and experimenting. There is so much in nature we are not aware.  For instance -Sea Slugs and the variety of shapes and colors they come in.   https://en.wikipedia.org/wiki/Sea_slug   Nor was I aware of the Ribbon eel - such a graceful unusual creature.   https://en.wikipedia.org/wiki/Ribbon_eel I began collecting pictures of the creatures that were appealing to me and that might support each other in a texture series.   Before the actual work could begin, the decision of how and what to use for mounting each piece was decided on.  The structure chosen was

My Twist on Tropical Fish

Image
  Ever wonder what you could do with those extra parts and pieces you have in containers?  I happened to pick up a polymer start to a bead and decided to do something else with it.  I may never know why it reminded me of tropical fish but it did.  This was my opportunity to experiment, create and learn.   These are polymer shells I learned to make in Dan Cormier's class and as it happens I got carried away and made several I did not use.  They make great fish bodies!   Next a little research -  I wanted my fish to be somewhat accurate (yes with lots of poetic license!)   https://en.wikipedia.org/wiki/Tropical_fish Then I started going through some of my old polymer canes and making some new colors and textures and the fun began!  Just coat the baked shells with liquid polymer and start applying textures and colors.  Once the fish were finished.....ok it was so much fun I may have to make more!...I needed seagrass to anchor them in the visual story. Long strands of seagrass came fro

Challenge: A Large Polymer Clay Bowl

Image
A challenge!  That's what I need to take me away from the world's overwhelming daily concerns.  So I wondered how big of a polymer clay bowl I could make.  What could I use for a form?  What technique would I use?  How much clay would it take and what would fit in my oven?  You've seen my 'Small Bowls for Little Things' on my Facebook Page ( https://www.facebook.com/LindaBrittDesign/ )  and in my Etsy shop ( https://www.etsy.com/shop/LindasButtonsBowls ).  If not, please take a look!  Those same questions were ones I had to answer when I started making the small bowls except in the other extreme.  How small could I make a bowl and it still be useful, what form to use and what technique?   One of my favorite bowls is a handmade Mexican pottery bowl with a scalloped edge.  It just fits in my little oven if I take the rack out.  I can use some of my large 3" cane slices that were left over from a Christmas ornament project as they will add interest.  The plan deve

A Presentation of a Brief Overview of Polymer Clay

Image
A collection of polymer jewelry 'Carnival' This week I made a presentation to members of Mountain Artists Guild here in Prescott AZ of some of the things I've made from polymer clay.  The purpose was to expend the members knowledge a about the many possibilities of this wonderful medium.  I wanted to share my slides with you hoping to also expand and inspire you! Collaboration in Wood, Decorated Eggs So many uses of polymer.  So many ways to create!

Which Story to Tell? Which Color to Wear?

Image
   My last post told how a mixed media wall piece combined wood, metal clay, feathers and ribbons to produce a story.   I introduced the 'Gastornis' - an extinct flightless primitive bird.  This week I'm sharing the 2 pendants I made at the same time I made the 'Gastornis' wall decor.   This post is about telling a story with jewelry and shows how color can add to the message. The pendant on the left above combines warm brass beads, meaningful red prayer beads and a handmade bronze wire clasp.  Does it made you feel excited?  The pendant on the right combines Hubei turquoise with silver and bronze.  The greenish color along with the silver cools the bronze.  Maybe this pendant makes you feel calmer?   Each of us bring our own color experiences with us.  I find it helpful to understand what we like and why.  That makes selections more meaningful and enjoyable.   Let's look at the pendant on the left and I'm going to call it 'The Warm Bird'.  This sto

The Winding Path To Creating a Story With Art

Image
                                                                                   New Direction Cleaning up my art studio always produces new directions in my projects.  As I reorganize and open drawers that have been closed for a while, I find tools I've forgotten.   Metal Creator This cleaning session uncovered The Metal Creator I purchased in a crowd funding several years ago.  It was invented by Bill Struve and consists of a foot pedal, a CO2 canister, two tubes and a regulator.  The purpose of this tool is to save hand stress as the CO2 pushes the metal clay paste through a syringe.  If I were using a typical syringe, my hand would push the plunger as the clay is extruded.  That gets pretty tiring after a while.   When I first purchased this tool, I also purchased 3 syringes of bronze metal paste.  Fortunately I used one of the syringes and stored the other 2.  One of those syringes was still a good consistency.  I hooked up the tool to try it out -thinking it was time to use

Artist Challenge:Decorating an Egg in Gustav Klimt's Style

Image
It seems that this 'stay at home' enforced time due to Covid 19 spurred many artists to challenge themselves.  Here's mine!  The Challenge:  Select an artist you love and a painting you love.  Apply the style of a 2 dimensional painting to a 3 dimensional object.   It was my challenge to myself and I chose Gustav Klimt and his painting 'Tree of Life' https://www.gustav-klimt.com/The-Tree-Of-Life.jsp My hollow turkey egg was ready for the first covering of polymer clay.   While that was curing, I looked through my stash of polymer canes (designs in polymer) and selected some that would work.  Next I made a few more and extruded strips to use for the tree and branches.   The design was sketched on the polymer covered egg and using a type of liquid polymer I applied the branches in areas and cured them in the oven.  I've learned to do a few at a time to keep shapes stable - that means baking the egg several times,  After the branches were done, the flowers and leav

Oh No! I Dropped My Egg and It Cracked!

Image
The next turkey egg is prepped, ready to apply the polymer design to the polymer covering.  This time my design is based on Deb Hart's techniques and a wrought iron design I like.  On goes the lines and I bake it.  Next I  fill in the spaces.   I tried using liquid polymer and quickly realized it wasn't going to work.  The curved surface encourages the liquid polymer to run off.  Now wouldn't you think I could have figured that out without trying it?  I like using 2 colors of polymer chopped and mixed to get depth and I also like chopping metallic polymer and using the mica shift to look like 2 colors.  That comes in the next egg! My design is finished and cured and now I need to sand.  I use 3 grades of sandpaper and my Jool Tube for the sanding.  It gets nice and smooth and even.  I take it to my drill press with the lambswool buffer.  Turn it on and start to buff and polish.  And then....the egg slips from my hand, hits the concrete floor and I hear the cracking sound!